
Table of Contents
- Why Sterling Silver Tarnishes (and What That Means for Cleaning)
- What You'll Need Before You Start
- How to Clean Sterling Silver Jewelry at Home: Step-by-Step Methods
- Cleaning Sterling Silver with Gemstones: What Changes
- Common Mistakes to Avoid When Cleaning Silver at Home
- How to Prevent Tarnish on Sterling Silver Between Cleanings
- How to Store Sterling Silver Jewelry to Slow Tarnish Long-Term
- When Home Cleaning Isn't Enough: Troubleshooting and Professional Care
Last Updated: August 17, 2026
Sterling silver tarnishes inevitably, but the good news is that most tarnish comes off with supplies you already own, and the right technique takes less than ten minutes. This guide walks you through every method, from gentle everyday cleaning to tackling heavy blackening, plus the storage science that keeps tarnish away longer.
Why Sterling Silver Tarnishes (and What That Means for Cleaning)
Sterling silver is an alloy composed of 92.5% pure silver and 7.5% other metals, most commonly copper. When the copper reacts with sulfur compounds in the air, skin, and everyday products, it forms silver sulfide, the dark, dull layer you see building up over time. This is a reversible chemical reaction, not structural corrosion.
Humidity, perfume, chlorine, and sweat accelerate oxidation. Pieces worn daily tarnish faster than those stored away, though constant friction also cleans them slightly. Understanding this process matters because it tells you what you're actually doing: breaking the chemical bond between silver and sulfide. Some methods work through mild abrasion, buffing away the layer. Others, like the baking soda and aluminum foil method, work through an electro-chemical ion exchange that draws the sulfide off entirely.
One important note: tarnish is not the same as plating wear. If your piece is gold-plated over sterling silver and the gold layer is wearing through, no amount of cleaning will restore the color.
What You'll Need Before You Start
For everyday cleaning:
- Mild dish soap (fragrance-free preferred)
- Warm water
- A soft-bristled brush (a baby toothbrush works well)
- A lint-free microfiber cloth
For heavy tarnish:
- Baking soda
- Aluminum foil
- Boiling water
- A glass or ceramic bowl (never metal)
For high-polish finishes:
- A commercial silver polish or silver polishing cloth
- Soft cotton or microfiber cloths for buffing
What to avoid entirely:
- Paper towels (too abrasive for polished surfaces)
- Toothpaste (often too abrasive and can scratch)
- Bleach or ammonia-based cleaners (cause corrosion)
- Ultrasonic cleaners for pieces with gemstone settings or glued components
According to the Gemological Institute of America's jewelry care guidelines, abrasive materials and harsh chemicals are among the most common causes of preventable damage to fine jewelry at home.
How to Clean Sterling Silver Jewelry at Home: Step-by-Step Methods
Three methods cover the full range of tarnish severity. Start with Method 1 for any piece, and only move to stronger options if the tarnish doesn't lift.
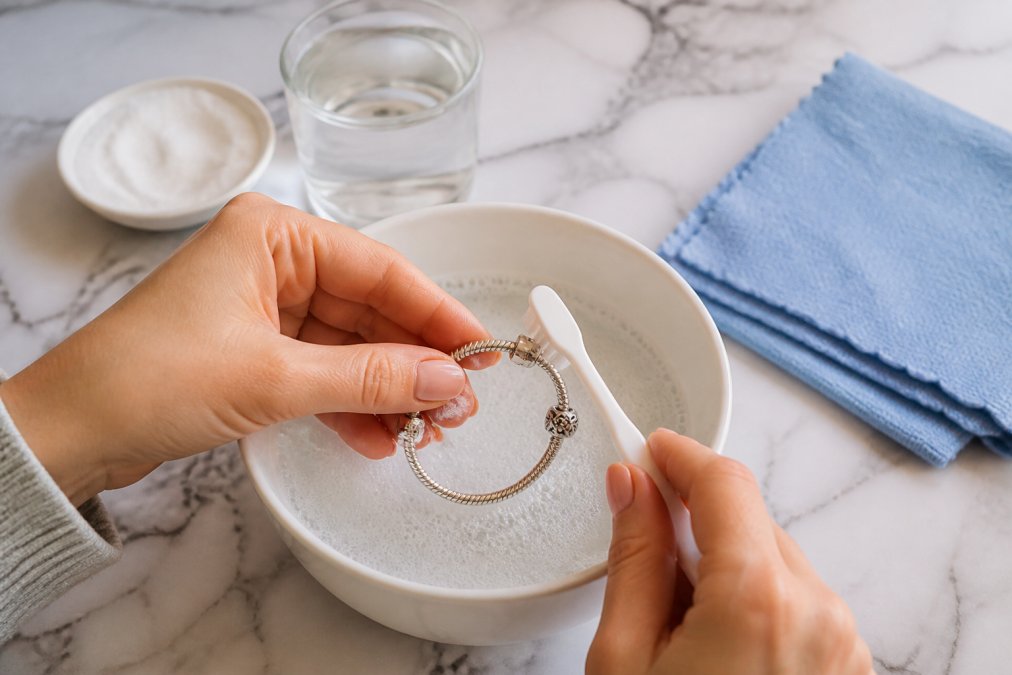
| Method | Best For | Tarnish Level | Time Required |
|---|---|---|---|
| Dish soap and warm water | All pieces, everyday maintenance | Light | 5 minutes |
| Baking soda and aluminum foil | Plain silver, heavy blackening | Heavy | 10-15 minutes |
| Commercial silver polish | High-polish finishes, stubborn tarnish | Moderate to heavy | 10 minutes |
Method 1: Dish Soap and Warm Water (Everyday Tarnish)
This is the method most pieces need most of the time. It removes light tarnish, skin oils, and product buildup without risk to the metal or most gemstones.
- Fill a small bowl with warm (not hot) water and add two or three drops of mild dish soap.
- Place the jewelry in the bowl and let it soak for three to five minutes.
- Use a soft-bristled brush to gently scrub all surfaces, paying attention to crevices and chain links.
- Rinse thoroughly under warm running water. Incomplete rinsing leaves a soap film that dulls the finish.
- Pat dry immediately with a microfiber cloth, then let air dry completely before storing.
This method is safe for most gemstone settings, but avoid prolonged soaking for porous stones like turquoise, pearls, or opals.
Method 2: Baking Soda and Aluminum Foil (Heavy Tarnish)
This method uses an electro-chemical reaction: the aluminum acts as a sacrificial anode, and the alkaline baking soda solution conducts an ion exchange that pulls silver sulfide off your jewelry and onto the foil.
- Line a glass or ceramic bowl with aluminum foil, shiny side up.
- Place the tarnished silver pieces on the foil, ensuring they make contact with it.
- Sprinkle one tablespoon of baking soda over the pieces.
- Pour boiling water slowly over everything until the jewelry is submerged.
- You'll see bubbling and possibly a sulfur smell. That's the reaction working.
- Leave for five to ten minutes, checking periodically.
- Remove the pieces with tongs or a spoon, rinse thoroughly under warm water, and dry completely.
Method 3: Commercial Silver Polish (High Polish Finishes)
For pieces with a high-mirror polish, commercial silver polish often delivers the best result because it combines a mild chemical cleaning agent with a fine abrasive designed specifically for the task.
- Apply a small amount of polish to a soft cloth or the applicator provided.
- Work in small circular motions across the surface, using light pressure.
- Use a clean section of cloth to buff the piece to a shine.
- Rinse under warm water to remove any polish residue, then dry thoroughly.
Cleaning Sterling Silver with Gemstones: What Changes
Gemstone settings change the cleaning equation significantly. The core rule is this: the cleaning method must be safe for the most delicate material in the piece, not just the silver.
Safe for dish soap and warm water (brief soak only):
- Diamonds, sapphires, rubies, and other hard, non-porous stones
- Most glass and crystal settings
- Cubic zirconia
Wipe-clean only (no soaking):
- Pearls: highly porous and sensitive to acids and alkaline solutions
- Opals: can crack with temperature changes and absorb water
- Turquoise: porous and reactive to soap residue
- Emeralds: often treated with oils that water and soap can strip
- Coral and amber: organic materials that react poorly to chemicals
Avoid all methods except dry polishing:
- Pieces with glued stones: any liquid risks dissolving the adhesive
- Enamel and resin details: chemicals and heat can discolor or warp them
For pieces featuring glass or enamel components, the safest approach is a soft microfiber cloth wipe-down after each wear and a very brief, gentle soap-and-water clean when needed. Avoid soaking and always dry immediately.
As the American Gem Society's gemstone care resource notes, when in doubt about a specific stone's sensitivity, consulting a professional jeweler before attempting any home cleaning is the safest course.
Common Mistakes to Avoid When Cleaning Silver at Home
Using toothpaste. Toothpaste contains abrasives coarse enough to scratch a high-polish silver surface. Over time, it creates micro-scratches that trap more tarnish and dull the finish permanently.
Skipping the rinse. Soap residue left on silver creates a film that attracts more grime. Rinse longer than you think necessary, especially in chain links and textured areas.
Air drying without patting first. Water spots and mineral deposits from tap water leave marks on polished silver. Always pat dry with a microfiber cloth before air drying.
Using the foil method on everything. The boiling water makes it unsuitable for many pieces. Using it on a pearl-set necklace or a piece with glued stones can cause serious damage.
Cleaning too aggressively too often. Every polishing session removes a microscopic layer of metal. Pieces with a matte finish are especially vulnerable: aggressive buffing converts a matte finish to a semi-gloss over time.
How to Prevent Tarnish on Sterling Silver Between Cleanings
Tarnish prevention comes down to limiting the silver's exposure to sulfur, moisture, and oxygen. A few consistent habits make a significant difference.
Apply products before putting jewelry on. Perfume, hairspray, sunscreen, and lotion all contain compounds that accelerate oxidation. Put your jewelry on last, after everything else has dried.
Remove silver before swimming, showering, and exercising. Chlorinated water, salt water, and sweat are all highly corrosive to sterling silver.
Wipe pieces down after wearing. A quick pass with a dry microfiber cloth after each wear removes skin oils and sulfur compounds before they react with the metal. This single habit extends the time between deep cleanings significantly.
Use anti-tarnish strips in your storage. These small strips absorb sulfur compounds from the air around your jewelry, slowing the tarnishing process at the source.
How to Store Sterling Silver Jewelry to Slow Tarnish Long-Term
Proper storage is the most underrated aspect of jewelry care. Good storage minimizes exposure to sulfur compounds and oxygen.
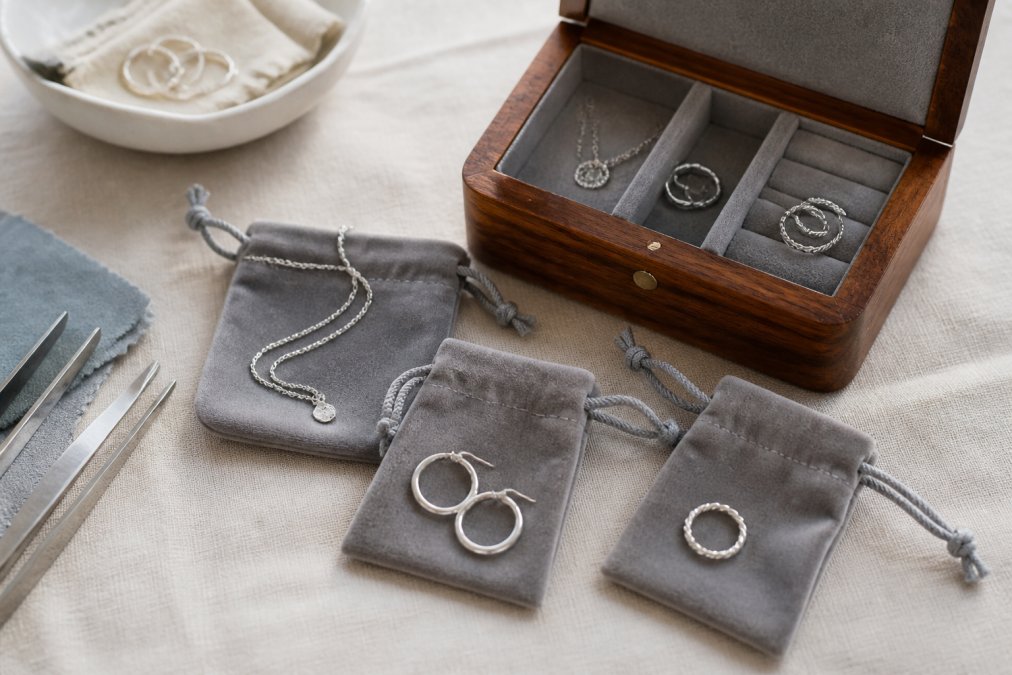
Store pieces individually. Silver scratches against other metals and even against other silver pieces. Individual storage pouches in soft velvet or anti-tarnish fabric protect the surface and limit air exposure.
Choose a cool, dry location. Humidity accelerates oxidation dramatically. Bathroom jewelry dishes are among the worst places to store silver. A bedroom drawer or a closed jewelry box in a dry room is far better.
Airtight containers for long-term storage. If you're putting a piece away for a season or longer, place it in a small zip-lock bag with the air pressed out, along with an anti-tarnish strip. This creates a low-oxygen, low-sulfur environment that dramatically slows tarnishing.
Silica gel packets work. Placing a silica gel packet inside your jewelry box absorbs ambient moisture, one of the key drivers of oxidation.
According to the Smithsonian Institution's guidelines on metal artifact preservation, controlling sulfur exposure and humidity are the two most effective strategies for slowing silver tarnish.
When Home Cleaning Isn't Enough: Troubleshooting and Professional Care
Most tarnish responds well to home cleaning. But some situations call for a different approach.
If the tarnish isn't lifting after multiple attempts, the piece may have developed a patina too deep for surface cleaning. A professional jeweler has access to professional-grade silver dips and ultrasonic cleaning equipment that can address this safely.
If the finish looks dull or scratched after cleaning, you may have used a method that was too abrasive for that particular finish. A jeweler can re-polish or re-finish a piece, though this removes metal and shouldn't be repeated frequently.
If cleaning reveals pitting or dark spots that won't come off, that may be actual corrosion rather than tarnish. This is structural damage that home cleaning cannot fix.
For eco-friendly disposal of cleaning materials: the baking soda and water solution from the foil method is non-toxic and can go down the drain. Commercial silver polishes often contain ammonia or other chemicals. Check the label and follow the manufacturer's disposal instructions.
For pieces with significant sentimental or monetary value, a professional consultation costs very little and can prevent irreversible damage. Many jewelers offer a quick inspection and cleaning recommendation at no charge.
For pieces that are genuinely high-quality sterling silver, like Gemma Azzurro's Mediterranean-inspired designs built for everyday durability, proper care at home is usually all that's needed to keep them looking their best for years.
The Jewelry Information Center's guide to professional jewelry care offers additional guidance on when professional servicing makes sense for different types of pieces and finishes.
Sterling silver tarnishes inevitably, but it doesn't have to stay that way. The methods in this guide handle everything from light everyday buildup to deep, stubborn blackening, and the storage habits outlined here will keep your pieces looking better between cleanings. If you're looking for sterling silver jewelry worth caring for, Gemma Azzurro's collection is crafted for long-lasting everyday wear, with Mediterranean-inspired designs in high-quality sterling silver built to hold up to real life. Browse the collection and find pieces that deserve to be worn, not stored away.
Frequently Asked Questions
What should you never use to clean sterling silver jewelry?
Avoid toothpaste, bleach, chlorine, and abrasive scrubbing pads. Toothpaste is too abrasive for sterling silver and scratches the surface, dulling high-polish finishes permanently. Bleach and chlorine accelerate corrosion and can pit the metal. Rubber gloves and rubber bands also speed up tarnish because sulfur compounds in rubber react with silver. Stick to soft microfiber cloths, soft-bristled brushes, and mild dish soap for safe results.
How often should you clean sterling silver jewelry?
For pieces worn daily, a quick wipe with a dry microfiber cloth after each wear removes skin oils and prevents buildup. A full soap-and-water clean every two to four weeks keeps light tarnish from setting in. Pieces worn less frequently benefit from a thorough cleaning before storage and again before wearing. Jewelry exposed to perfume, sweat, or chlorine needs more frequent attention to prevent oxidation from accelerating.
Does sterling silver permanently tarnish?
No. Tarnish on sterling silver is a surface reaction between silver and sulfur compounds in the air, forming silver sulfide. Because it sits on the surface rather than penetrating the metal, it can be removed with the right cleaning method. Even heavy, dark tarnish typically responds to the baking soda and aluminum foil electro-chemical method. The only exception is deep pitting from prolonged exposure to harsh chemicals, which requires professional polishing.
Is the baking soda and aluminum foil method safe for all sterling silver pieces?
This ion exchange method works well on plain sterling silver but is not safe for pieces with gemstone settings, gold plating, or matte finishes. The alkaline solution can damage porous stones like pearls, turquoise, and opals, and can strip thin gold plating. For jewelry with stones or special finishes, use the mild dish soap method with a soft-bristled brush instead, and dry thoroughly with a microfiber cloth to prevent water spots.
This article was written using GrandRanker


